
I've been building model kits of the Enterprise for many years (I believe I got my first model of the Enterprise in 1971). I've built a few dozen, and over the course of those builds got better and better at it. By the late 1980s I was replacing many parts with corrected wood parts based on the best plans available at that time by Allen Everheart and with help from photos of the 11 foot model in the Smithsonian taken by my wife.
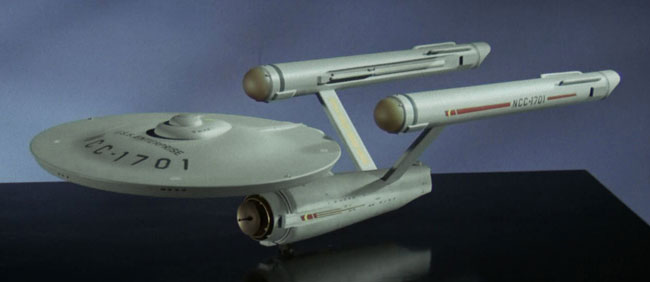
As the models got more and more accurate to the 11 foot model I started to realize that they still weren't what I really wanted. And then one day while watching Star Trek ("Requiem for Methuselah") I realize why my models hadn't lived up to what I wanted from them, they don't look like this one...
In the intervening years I learned a lot about that model in a quest to have one like it.
So a couple years ago I started working towards making one. No longer having the resources I once did for building models and props (specifically, I no longer have access to a wood shop like my Grandfather had), I decided to scale it back a little... to two-thirds the size of the original.
Why two-thirds? That made it about the same size as the 22 inch cutaway model of the Enterprise. I could scavenge parts from the kit, use some third-party parts and decals to cut down on the amount I would need to build on my own.
I printed out my 33 inch model plans at 2/3 scale and made comparisons to the parts in the kit. With some modification I could use the secondary hull (but not the dorsal), the nacelles and their supports. That left me to build the primary hull and dorsal pretty much from scratch. Fortunately the bridge and B/C deck structure from Don's Light & Magic matched up with my plans pretty nicely.
To be on the safe side I had two copies of the kit (in case I needed replacement parts). But I was able to make my modifications to the parts I was going to use without having to resort to them... which meant I had pretty much a full kit that could be built on it's own.
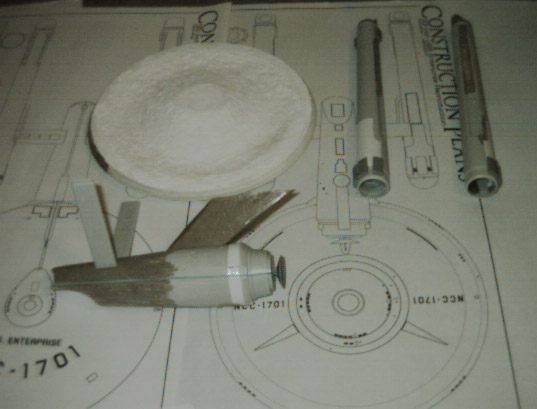
Below is most of the Enterprise elements after my modifications.
In order to get a feel for what it was I was building, I made a foam-core stand-in for the primary hull. I had intended on making the hull using a lathe, but after a year of looking for someone I knew who might have one handy, I finally decided to attempt to make the primary hull on my own by hand.
So starting with my foam-core stand-in, I filled in the stair steps with a paper mache pulp (which is what you see in the image above). After some time of sanding I got the basic form to where I wanted it.

This raw surface wasn't going to work for a model, so I used layers of paper and Elmer's Glue (and a lot of sanding) to slowly even out the surface. This is the process part way through.

And this is the nearly completed primary hull (the extra parts aren't attached yet, their just there to see how things are coming along.
On the plus side, it can return to the role it was playing before... that of being a test article for some of my ideas. And in that renewed role, I successfully cut the hole in the primary hull for the dorsal and it worked nicely. Here is a test fitting of most of the major pieces (including the test primary hull) fitted together (though nothing is glued together at this point).
- to be continued -
(I'll eventually be returning to finish this page)
|
