 | | | | | | | | | | | | | | | | | | | | | | | | |
|
| |

|
|
Your First Image
Now that you have successfully installed TIFFany it's time to become familiar with the basics. TIFFany incorporates innovative techniques which might be unfamiliar to those of you who have used other imaging software. Despite the unusual interface, TIFFany's powerful capabilities will become clear in a very short period of time.
Lets define a goal
Let's set our goals at reasonable level by creating an image and learning how to manipulate this image.
Like many other NEXTSTEP applications you can create a new document by pressing Command-n or selecting the New... menu item under the Document submenu. |
|
| | | | | |
|
|
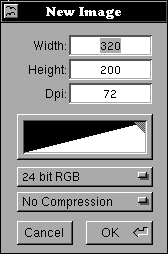
| The New Image panel will allow you to select the image size and Dots Per Inch (DPI) of your new image. Also at this time other characteristics such as background color, Color Space, and compression type may be selected |
|
| |
|
|
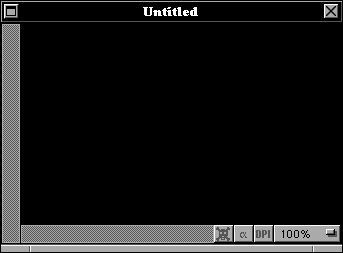
After selecting your image characteristics, TIFFany will create a
Window with your image embedded.
Tool Panel
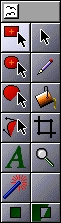
Now that we have created a new image its time to take a look at the tools that we will use to manipulate it. |
|
| | | | | | | | | |
|
|
| The tool panel contains all the necessary utilities to apply a desired effect to your image. For the scope of the Getting Started tutorial we will be focusing on the |
|
| | | | |
|
|
| | | | |

|
|
Actions and Action Manager
TIFFany's actions are much like what other imaging packages call filters. Actions, however, differ from the standard filter because they may be applied with any of TIFFany's tools. For example, not only can you use the Brush tool apply a color to an area of an image you may also brush a sharpen effect or even UNDO!
TIFFany's actions are stored and selected from the Action Manager. TIFFany can have multiple Action Managers that can be saved and reloaded at a later time. You may want to have a separate Action Manager for each project you are working on. |
|
|
|
|
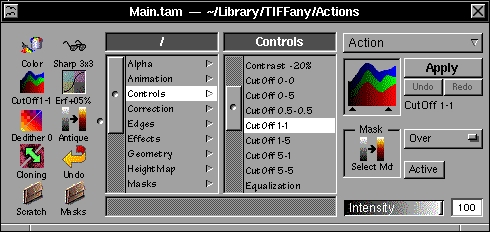
The Action Manager window is intuitively designed to provide quick access to TIFFany's many actions.
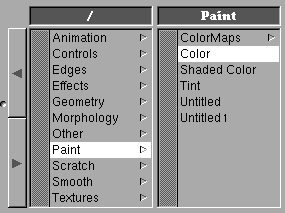
Much like NEXTSTEP's File Viewer TIFFany's Action Manager has a browser that will let you store and retrieve actions from logical action groups.
|
|
| | | |
|
|
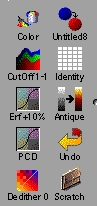
The Action Manager also incorporates a Shelf where you can drag frequently used actions for quick selection.
|
|
| | | | | | | |
|
|
The Action Well displays the currently selected action.
|
|
| | | | | | | | | |

|
|
Let's Paint!
To get familiar with how TIFFany works lets do something simple like paint a color in our new image.
Make sure your Color Action is selected by clicking on the Color Action icon in the Action Manager shelf or finding it in the action Browser under the Paint group.
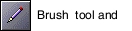
After the Color Action is selected press the Brush Tool button in the Tool panel to start brushing.
Now that we have the Brush Tool and the Color Action selected we will need to chose a color. Do so by displaying the NEXTSTEP Color Panel via the Command-C quick key. Use any of the Color Panel methods to choose your desired color. |
|
| | | | | | |

|
|
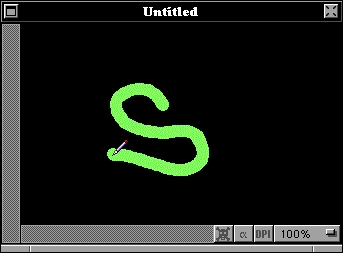
After making our image window the key window by pressing the mouse button in the window title bar we can start to paint. To paint simply move the mouse cursor to the location you wish to start and press your main mouse button. While holding the mouse button down move the mouse to the areas you wish to brush releasing when finished...
|
|
| | |
|
|
Now select another color and repeat the process again...
|
|
| | |

|
|
Now that we are familiar with choosing tools and actions and applying them we need to know how to undo what we have done in the case of error or change of heart. Another power of TIFFany is it's multi-level undo... In the previous example we painted twice therefore we have two levels of undo we can work with. Stepping back through the different levels is done by the Undo button in the Action Manager or by the Command-z quick key.
Just for kicks lets undo the two actions we applied earlier. Don't worry we can Redo the actions with the Redo button in the Action Manager or by the Command-Z quick key. Go ahead and redo the actions...
WARNING: If you undo actions and then apply an action all undo levels after that point in the undo list will be lost!
One more tool example!
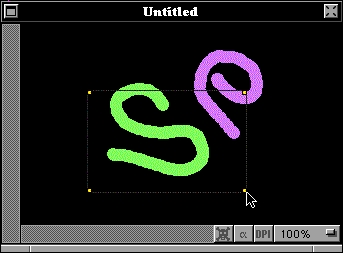
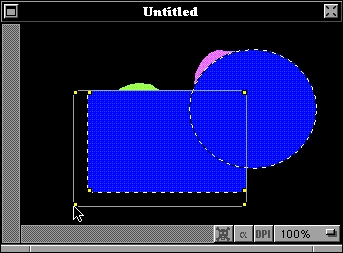
The area selection will be one of the most used tools. There are six Area Selection tools in TIFFany. Since they all work in the same basic manner we will use the Rectangular Selection for example.
Select the Rectangular Selection tool in the Tool panel and once again make our image window key.
Now click on the point you want to place a corner of the selection and drag the mouse to size the selection to your liking.
|
|
| |
|
|
After releasing the mouse button the selection will be formed and ready for use.
|
|
| |

|
|
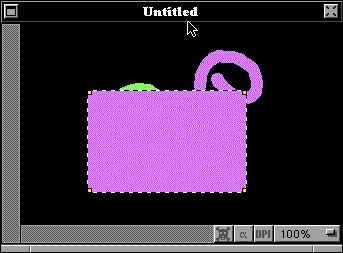
Now that we have an area of our image selected we want TIFFany to perform an action to it. Since the area selections are not interactive we simply need to press the Apply button in the Action Manager.
|
|
| | | | | | | | |

|
|
| | |
|
|
We see that the area was filled with our current selected Color Action.
|
|
| |
|
|
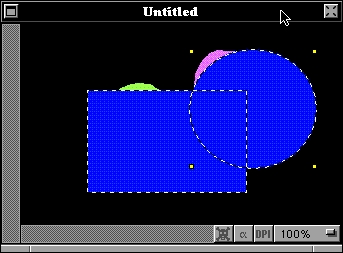
The previous example was done with the Circular Tool and making a multiple selection by holding the shift key while dragging the Circular Selection. Then choosing a new color and applying the Color Action via the Action Manager.
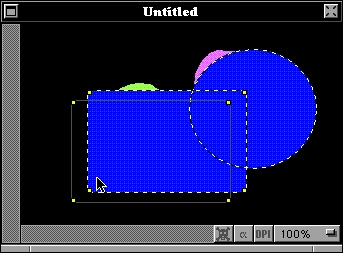
Once you have areas selected on your image they may be moved and resized with the Pointer Tool
Areas may be moved by dragging from a point within the area. |
|
| |
|
|
| Areas may be resized by dragging one of the corner knobs to a new location |
|
| |
|
|
Saving your work
Command-s will display the standard NEXTSTEP Save Document panel. This panel will allow you to specify the name and location of your artwork.
|

