
|

|
|
|
 | | | | | | | | | | | |
|
|

| |

|
|
|
| | | |
DataPhile Y2K is a major upgrade to DataPhile 3.1 and fixes all the millenium date handling issues as well as adding Publish To Web functionality. If you are still running DataPhile on NeXTSTEP or OpenStep, this is a "Must-Have" upgrade!
Producing Web Pages with DP Y2K
It's easy to build web sites or subsections of web sites with DataPhile. It includes the ability to turn data fields into URL's to automatically link connected data by exporting HTML from various views and layouts.
To get you started, we've included a new Template database, named "Web_Gallery". Choose Database->Templates->Web_Gallery to bring up a multimedia database with thumbnails and larger art pieces. DataPhile was used to create the Richard Levy Gallery Website, and this db has a few of those records, and many different views which then created thumbnails, index by artist, and the large scale image pages. Open the Web_Gallery database. |
|
| | | |
| |
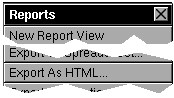
The current "view" will provide which data, and in which order, web pages are created. Simply sort your database as you want the web pages to be consecutively linked, and choose Reports->Export As HTML... |
|
|
|
| |
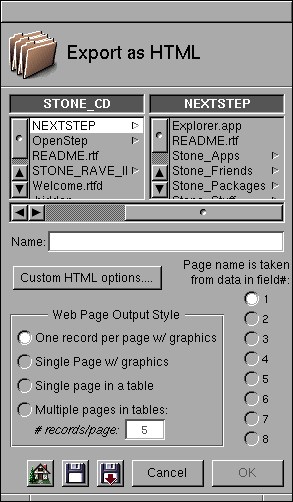
There are 4 basic styles of web pages produced by DataPhile, which you choose on the Save Panel:
One Record per Page w/ graphics:
This exports the picture fields and all text with rich text formatting
Single Page w/ graphics:
All the records showing in the current view will be output to a single HTML page, and graphics will be included.
Single Page in a table:
For neatly laying out info, without the noise of various formats, this is a simple way to dump your database to a single HTML page.
Multiple Pages in a table:
For large databases, you may choose to output only a few records per page. Choose this option, and then enter the number of desired records to be output on each page in the text field.
The names of your web pages can be taken directly from the data in in a field. Let's say the artist's name is in field 1, exp. "Keith Haring". Then a page would be named after that data:
Keith_Haring.html. Since you can turn fields into live links, another page having "Keith Haring" in a field will automatically be linked to the original page. Select the field, numbered by its order on the View, from top to bottom, left to right. |
|
| |
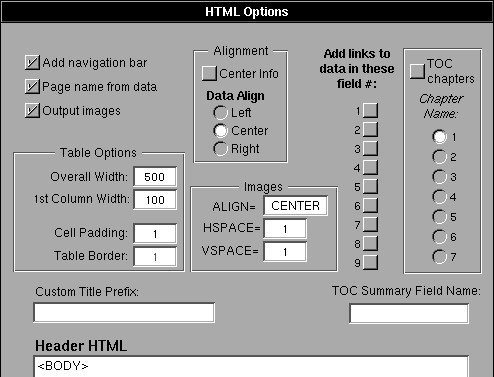
Click on the Custom HTML Options... button to bring up this panel, which allows you to finely control the HTML output by DataPhile:
|
|
| |
|
|
| |
Add navigation bar - when checked, each page produced will have a text navigation bar which links that page to the next page, the previous page, and the Table of Contents (TOC).
Page name from data - when checked, DataPhile tries to use the data in a given record to name that page. Example - if you have a field named "Artist", and "Jackson Pollack" was the data, then the output html page would be named "Jackson_Pollack.html". NOTE: you choose which field does the naming in the Save Panel's radio button matrix - the fields are numbered from top to bottom, left to right.
Output images - This is normally checked, but in the case you wish to just change the HTML because you've already done the image creation, this can save a bunch of time by NOT outputing the images.
Table Options:
Overall Width - this determines the width of the table which holds your data. 576 is default.
1st Column Width - this determines the width of the first column. This is very useful for putting thumbnail images as the first field. See the Web_Gallery database for a sample of this.
Cell Padding - this determines the extra space around a cell. 1 is default
Table Border - determines how wide the table borders are. Enter 0 for no borders at all.
Alignment:
Center Info - when checked, will add <CENTER> tags around your data. When not checked, normal left alignment of data occurs.
Data Align - attempts to format each cell of text with selected alignment.
Image Align - use "CENTER", "LEFT" or "RIGHT". Center produces the least side-effects!
HSPACE - the horizontal padding around each Image. 10 points by default.
VSPACE - the vertical padding around each image. 10 points by default.
Add links to data in these fields - select each field number (again, numbered from the top to the bottom, left to right on the current view) that you wish to be turned into a clickable link in the output HTML. When you take a database with many different subsets of fields in various views, you can automatically create links betweens these pages by choosing different fields to determine the title of the page, and selecting various fields to be hot links. Hard to explain, but quite powerful once you grok what's going on.
Table of Content (TOC) Options:
With "Chapters", you can produce Table of Contents which have Chapter URLs, and then an entry for each individual page in that chapter. See the online Create Manual TOC for an example of this. The name of the chapter is taken from the data in the field you select in the radio matrix, you must turn the feature on by checking the TOC Chapters switch. Enter the name of the field which you want used for summarizing into the TOC Summary Field Name textfield.
Custom Title Prefix - in the <TITLE> tag, you can augment what appears as the title in this field. For example, you might want to prefix your manual page output with "Create Manual ->".
Header Field - this is where you place any custom HTML you want, including the <BODY> tag, which can include colors, background images, etc. Simply type or paste your HTML into this field. Use <ALTERNATE> <RETURN> to place returns in the field for easier reading. This HTML appears before the content of the page generated by the database.
Footer Field - here is where you place your own custom HTML, for example your site copyright or custom navigation bar. This HTML will be output after the content, but before the final </BODY> tag.
Exporting the Calculated Field Formulas
For debugging, archival purposes or reuse, it's handy to be able to find all the calculated field formulas in a database without investigating each field via the Define... panel. Choose Reports-> Export Calculations... which will create a text file of the formulas.
Download About DataPhile TOP |
|

|